Rules of Survival Legacy Cover and Positioning
Lean, wall fire, angles, high ground, and positional warfare for classic ROS-style PC battle royale.
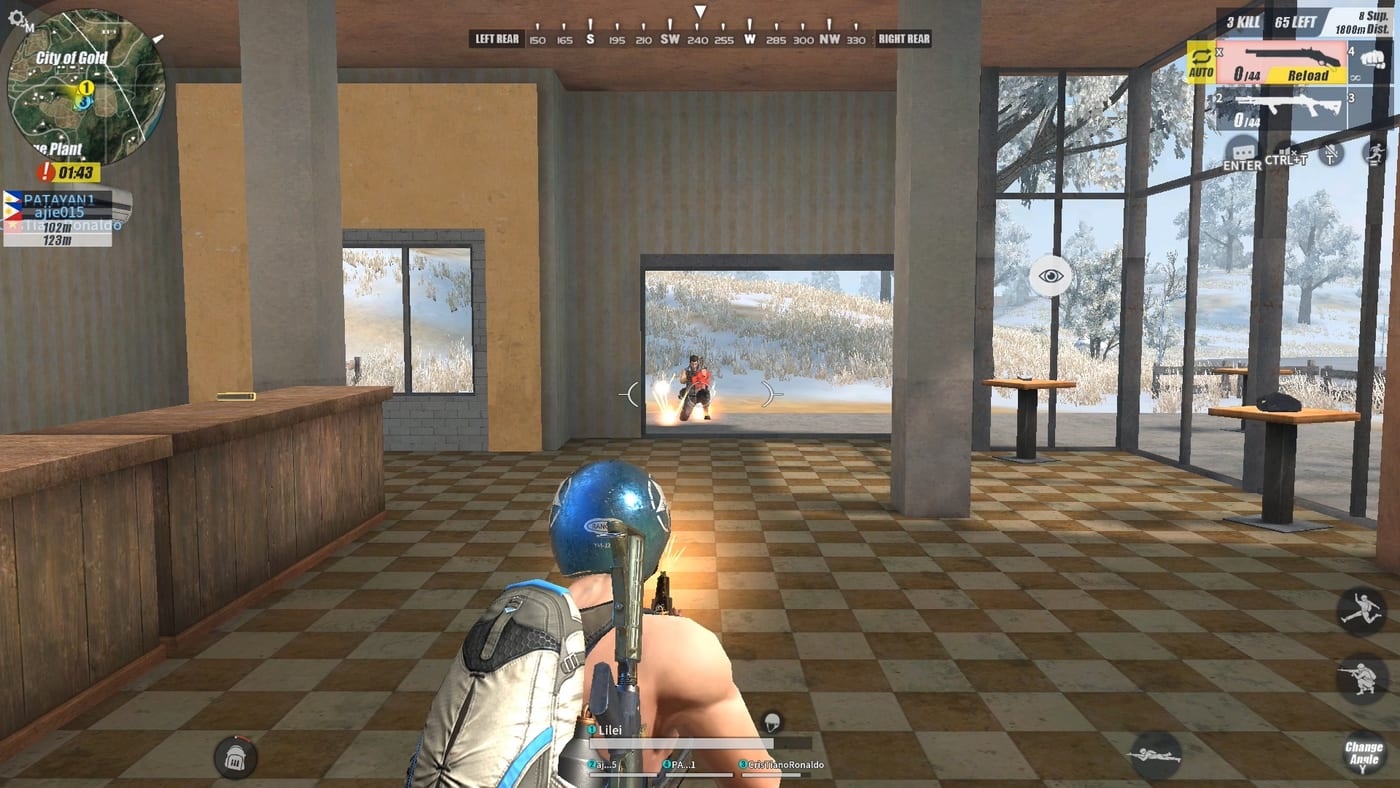
Every battle royale fight resolves into positioning questions: Which angle holds? Where is the high ground? Can I dry-peek this corner? Rules of Survival Legacy is Under Development at Myth Games for PC, reviving the classic ROS tension where one good position meant more than one good gun. This guide teaches cover usage, angle selection, and positional habits that won fights in 120-player lobbies on Ghillie Island and Fearless Fiord’s vast snow fields鈥攕kills you can internalize now before Myth opens test servers.
Combine this guide with movement techniques for fluid combat, circle strategy for zone-aware positioning, and PC keybinds for fast lean and peek execution.
Understanding cover types
Cover in classic ROS fell into three categories. Each rewarded different playstyles and demanded different reactions.
Hard cover: Concrete walls, vehicle bodies, rock formations, and building structures stopped bullets entirely. Hard cover allowed full commitment to angles without bullet exposure. Training Base barracks, Rust Bay warehouses, and Observatory walls defined hard cover positions on classic maps.
Soft cover: Wooden fences, thin structures, and vegetation stopped bullets slower than hard cover. AWM rounds could punch through soft cover at close range. Treat soft cover as temporary protection that required quicker rotation than hard cover positions.
Partial cover: Ridgelines, hay bales, and low walls exposed your head while protecting your body. Partial cover demanded either staying crouched below the exposure line or accepting headshot risk while maintaining your angle.
Angle and peek mechanics
Angles determined who saw whom first鈥攁nd first look meant first shot. Classic ROS rewarded players who understood angle geometry without needing a tactical overlay.
Wide angle: Position yourself so you can see the opponent’s exposed body while minimizing your own exposure. Inside Training Base, this meant standing at the corner edge where only your shoulder showed while your opponent exposed their full torso.
Short angle: Approach the corner closely to reduce the distance the opponent must pan to track you. Short angles worked when you expected the enemy to hold a wide angle first鈥攜ou could pre-aim the corner and react faster.
Cut the angle: Position yourself so your crosshair naturally points at the common entry point while you present minimal exposure. A player guarding a Bitter Lake doorway naturally cut the angle by standing perpendicular to the wall, watching the doorframe.
Lean and wall fire
Lean mechanics in classic ROS let you fire around corners without full exposure. Understanding lean timing separated skilled peekers from players who got prefired.
Wall fire: Lean out just far enough to see your target and take the shot, then retreat before the opponent can return fire. Wall fire worked best with accurate weapons like ACR or M4A1 where one burst decided engagements.
Pre-aim wall fire: When you suspected an enemy at a corner, pre-aim the corner edge at head height, then lean out for the instant shot. Pre-aim reduced the tracking time your opponent had. Pair this with sensitivity tuning so pre-aims translated to muscle memory.
Double peek: Fire at one angle, retreat, then immediately peek from the opposite side. Classic ROS players used double peeks to bait the opponent’s crosshair to one side before exposing from the other. Works best against players holding a static wide angle.
High ground principles
High ground in classic ROS meant several advantages: earlier sightlines, easier headshots, and psychological pressure on opponents below. Observatory on Ghillie Island and elevated terrain across Fearless Fiord defined high ground positions worth contesting.
Offensive high ground: Push uphill when you hold a ranged weapon like AWM or Barrett. Your淇 made tracking easier while your elevated position made you harder to rush without taking damage.
Defensive high ground: Hold the top of a hill or staircase when enemies must push upward. They exposed their heads while climbing; you aimed down at stable torsos. Bitter Lake compounds with upper floors exemplified defensive high ground.
High ground surrender: Sometimes you must abandon high ground to follow the circle or avoid a third-party. Descend using cover鈥攏ever walk straight down an open slope where AWM players could track you.
Positioning during circle phases
Zone phases demanded positioning habits distinct from mid-fight mechanics.
Zone edge positioning: Stand inside the safe zone with your back to the blue border. This eliminated 180-degree awareness demands and let you focus on threats approaching from the playable side. Edge positioning worked during early and mid-circles.
Center positioning: Move toward zone center during early circles when the border was far. Center positioning minimized rotation distance as zones closed and reduced the probability of being caught in open terrain during late zones.
Rock and tree positioning: Fearless Fiord’s snow fields offered limited natural cover. Use rock formations and evergreen clusters as temporary safe zones during rotations. Position behind cover with clear sightlines rather than behind cover that blocked your own angles.
Angle trading and third-party awareness
Trading angles meant switching targets when your current angle became dangerous. Classic ROS rewarded players who recognized angle trade situations faster than opponents.
Angle trade signals: Gunfire from an unexpected direction, footsteps merging with ambient sound, or a vehicle approaching from flank all signaled angle trade situations. Retreat behind hard cover and reassess before committing.
Third-party discipline: After winning a fight, prioritize re-healing and repositioning over chasing survivors. Classic ROS punished players who chased kills after winning an initial engagement鈥攖he third party rarely missed the distracted, wounded player.
Sound-based positioning: Use gunfire volume to estimate distance and direction. Loud, unsuppressed shots meant close-range action鈥攚orth investigating for easy cleanup. Quiet suppressed fire meant distant or conservative opponents鈥攍ess rewarding to third-party.
Building and room positioning
Inside buildings, positioning meant controlling sightlines and chokepoints rather than wide-open angles.
Doorway control: Hold the inside of doorways rather than the outside. Inside positioning let you see enemies enter while they had to stop and scan. Classic defensive players preferred inside holds at Training Base.
Stairwell positioning: Control the top or bottom of staircases rather than mid-stair. Mid-stair positioning exposed you to shots from both directions without the ability to retreat efficiently.
Window positioning: Stand beside windows rather than directly in them. Side positioning reduced your exposed profile while maintaining sightlines. Classic players used this in Observatory’s elevated windows and Rust Bay warehouse openings.
Common positioning mistakes
Standing in the open during reload: Always find cover before reloading. Classic ROS punished exposed reloads with instant eliminations. Holding an angle too long: Angle holdings that exceeded 30 seconds without firing gave away your position through sound and movement. Rotate or reposition periodically. Committing to low ground against pushers: Players pushing uphill held natural high ground advantage. Contest low ground positions quickly or surrender them to attackers below. Ignoring the circle: Final circles compressed terrain until positioning mattered more than gunskill. Practice zone positioning using the circle strategy guide.
Connecting positioning to maps and builds
Positioning skills apply differently across map zones and loadouts:
Ghillie Island map 鈥?urban and military positioning inside Training Base and Rust Bay Fearless Fiord map 鈥?open-field positioning on snow terrain Solo loadout 鈥?self-sufficient positioning without team support Squad roles 鈥?coordinated positioning within fire teams
What Legacy may adjust
Myth Games has not confirmed whether Legacy preserves classic ROS cover geometry and building layouts. Monitor Discord and updates for map-specific positioning notes once playtests open.
Related pages
Movement Techniques 鈥?fluid positioning execution Close Combat 鈥?CQB positioning inside buildings Circle Strategy 鈥?zone-aware positioning Beginner Mistakes 鈥?positioning errors to avoid
Questions fréquentes
Réponses rapides aux questions les plus courantes.
What is the best cover type in classic ROS?
Hard cover like concrete walls and vehicle bodies offered full bullet protection. Always prioritize hard cover over soft cover when available.
How does lean work in Rules of Survival?
Lean let you fire around corners with minimal exposure. Use it for quick wall fire, pre-aim peeks, and angle manipulation during fights.
Is high ground always better?
High ground offers better sightlines and easier headshots, but it also makes you visible. The best position depends on your weapon, the circle, and enemy positioning.
Should I hold angles or peek aggressively?
Both have value. Hold angles when you expect enemies to come to you. Peek aggressively when you want to control the engagement timing. Switch tactics based on HP, circle phase, and squad status.
How do I position during final circles?
Final circles favor players who held zone center or prime terrain early. Use the circle strategy guide for zone positioning details.
Will Legacy change cover mechanics?
Unknown until Myth publishes playtest notes. Cover geometry and lean mechanics may be updated for the PC revival.